
使用 API Explorer 收发消息
最近更新时间: 2025-10-11 18:10:00
操作场景
API Explorer 提供了在线调用、签名验证、SDK 代码生成和快速检索接口等能力。您可查看每次调用的请求内容和返回结果以及自动生成 SDK 调用示例。 该任务通过 API Explorer 指导您使用 HTTP 协议接入 TDMQ Pulsar 版并收发消息。
前提条件
- 参考 资源创建与准备 创建好集群,命名空间、Topic 等资源。
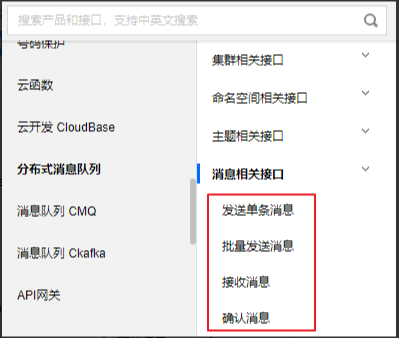
- 登录 云 API 控制台,选择 API Explore > 分布式消息队列 > 消息相关接口。

发送消息
说明:
您可以点击以下页签,查看发送单条和批量消息的具体说明。
发送单条消息
输入参数说明:

| 参数 | 说明 |
|---|---|
| Topic | 消息要发送的 Topic 的名字, 这里尽量需要使用 Topic 的全路径,即:tenant/namespace/topic。如果不指定,默认使用的是:public/default。注意:暂时不支持全局顺序类型的 Topic。 |
| Payload | 要发送的消息的内容。 |
| StringToken | Token 是用来做鉴权使用的,可以不填,系统会自动获取。 |
| SendTimeout | 设置消息发送的超时时间,默认为30s。 |
| MaxPendingMessages | 内存中缓存的最大的生产消息的数量,默认为1000条。 |
注意:
全局顺序 Topic 暂不支持通过 HTTP API 收发消息。
在线调用:
在页面上方选择在线调用页签,单击发送请求,返回结果如下。
 生成代码示例:
验证完成后,在代码生成页签的代码框中选择自己需要的语言,即可生成对应的代码示例。
以 Java 语言为例:
生成代码示例:
验证完成后,在代码生成页签的代码框中选择自己需要的语言,即可生成对应的代码示例。
以 Java 语言为例:
import com.tencentcloudapi.common.Credential;
import com.tencentcloudapi.common.profile.ClientProfile;
import com.tencentcloudapi.common.profile.HttpProfile;
import com.tencentcloudapi.common.exception.TencentCloudSDKException;
import com.tencentcloudapi.tdmq.v20200217.TdmqClient;
import com.tencentcloudapi.tdmq.v20200217.models.*;

public class SendMessages
{
    public static void main(String [] args) {
        try{
            // 实例化一个认证对象,入参需要传入腾讯云账户secretId,secretKey,此处还需注意密钥对的保密
            // 密钥可前往https://console.cloud.tencent.com/cam/capi网站进行获取
            Credential cred = new Credential("SecretId", "SecretKey");
            // 实例化一个http选项,可选的,没有特殊需求可以跳过
            HttpProfile httpProfile = new HttpProfile();
            httpProfile.setEndpoint("tdmq.tencentcloudapi.com");
            // 实例化一个client选项,可选的,没有特殊需求可以跳过
            ClientProfile clientProfile = new ClientProfile();
            clientProfile.setHttpProfile(httpProfile);
            // 实例化要请求产品的client对象,clientProfile是可选的
            TdmqClient client = new TdmqClient(cred, "ap-guangzhou", clientProfile);
            // 实例化一个请求对象,每个接口都会对应一个request对象
            SendMessagesRequest req = new SendMessagesRequest();
            req.setTopic("pulsar-****");
            req.setPayload("hello world");
            // 返回的resp是一个SendMessagesResponse的实例,与请求对象对应
            SendMessagesResponse resp = client.SendMessages(req);
            // 输出json格式的字符串回包
            System.out.println(SendMessagesResponse.toJsonString(resp));
        } catch (TencentCloudSDKException e) {
            System.out.println(e.toString());
        }
    }
}
批量发送消息
输入参数说明:

| 参数 | 说明 |
|---|---|
| Topic | 消息要发送的 Topic 的名字, 这里尽量需要使用 Topic 的全路径,即:tenant/namespace/topic。如果不指定,默认使用的是:public/default。 |
| Payload | 要发送的消息的内容。 |
| StringToken | Token 是用来做鉴权使用的,可以不填,系统会自动获取。 |
| ProducerName | producer 的名字,要求全局是唯一的,如果不设置,系统会自动生成。 |
| SendTimeout | 设置消息发送的超时时间,默认为30s。 |
| MaxPendingMessages | 内存中缓存的最大的生产消息的数量,默认为1000条。 |
| BatchingMaxMessages | 每一个 batch 中消息的最大数量,默认值:1000条/batch。 |
| BatchingMaxPublishDelay | 每一个 batch 最大等待的时间,超过这个时间,不管是否达到指定的batch中消息的数量和大小,都会将该 batch 发送出去,默认:10ms。 |
| BatchingMaxBytes | 每一个 batch 中最大允许的消息的大小,默认:128KB。 |
在线调用:
在页面上方选择在线调用页签,单击发送请求,返回结果如下。
 生成代码示例:
验证完成后,在代码生成页签的代码框中选择自己需要的语言,即可生成对应的代码示例。以 Java 语言为例:
生成代码示例:
验证完成后,在代码生成页签的代码框中选择自己需要的语言,即可生成对应的代码示例。以 Java 语言为例:
import com.tencentcloudapi.common.Credential;import com.tencentcloudapi.common.profile.ClientProfile;import com.tencentcloudapi.common.profile.HttpProfile;import com.tencentcloudapi.common.exception.TencentCloudSDKException;import com.tencentcloudapi.tdmq.v20200217.TdmqClient;import com.tencentcloudapi.tdmq.v20200217.models.*;public class SendBatchMessages{ public static void main(String [] args) { try{ // 实例化一个认证对象,入参需要传入腾讯云账户secretId,secretKey,此处还需注意密钥对的保密 // 密钥可前往https://console.cloud.tencent.com/cam/capi网站进行获取 Credential cred = new Credential("SecretId", "SecretKey"); // 实例化一个http选项,可选的,没有特殊需求可以跳过 HttpProfile httpProfile = new HttpProfile(); httpProfile.setEndpoint("tdmq.tencentcloudapi.com"); // 实例化一个client选项,可选的,没有特殊需求可以跳过 ClientProfile clientProfile = new ClientProfile(); clientProfile.setHttpProfile(httpProfile); // 实例化要请求产品的client对象,clientProfile是可选的 TdmqClient client = new TdmqClient(cred, "ap-guangzhou", clientProfile); // 实例化一个请求对象,每个接口都会对应一个request对象 SendBatchMessagesRequest req = new SendBatchMessagesRequest(); req.setTopic("pulsar-****"); req.setPayload("hello world"); // 返回的resp是一个SendBatchMessagesResponse的实例,与请求对象对应 SendBatchMessagesResponse resp = client.SendBatchMessages(req); // 输出json格式的字符串回包 System.out.println(SendBatchMessagesResponse.toJsonString(resp)); } catch (TencentCloudSDKException e) { System.out.println(e.toString()); } }}
消费消息
完整一次消费消息的过程为:
- 先调用接收消息接口,获取到消息的 ID 和内容。
- 对消息完成本地业务处理。
- 再调用确认消息的接口完成对消息的确认。
接收消息
输入参数说明

| 参数 | 说明 |
|---|---|
| Topic | 消息要发送的 Topic 的名字, 这里尽量需要使用 Topic 的全路径,即: tenant/namespace/topic。如果不指定,默认使用的是:public/default。 |
| SubscriptionName | 订阅者的名字。 |
| ReceiverQueueSize | 默认值为1000,consumer 接收的消息会首先存储到 receiverQueueSize 这个队列中,用作调优接收消息的速率。 |
| SubInitialPosition | 默认值为:Latest。用作判定 consumer 初始接收消息的位置,可选参数为:Earliest、Latest。 |
输出结果
在页面上方选择在线调用页签,单击发送请求,返回结果如下。

说明:
- MessageID:标识消息的唯一的ID,请注意保存,确认消息时需要填写该参数。
- MessagePayload:接收的消息的内容。
确认消息
输入参数说明

| 参数 | 说明 |
|---|---|
| MessageId | 用作标识消息的唯一的 ID(可从 receiveMessage 的返回值中获得)。 |
| AckTopic | Topic 名字(可从 receiveMessage 的返回值中获得)这里尽量需要使用 Topic 的全路径,即: tenant/namespace/topic。如果不指定,默认使用的是:public/default。 |
| SubName | 订阅者的名字,可以从 receiveMessage 的返回值中获取到。这里尽量与 receiveMessage 中的订阅者保持一致,否则没办法正确 ack 接收回来的消息。 |
在线调试
在页面上方选择在线调用页签,单击发送请求,返回结果如下。

生成代码示例 验证完成后,在代码生成页签的代码框中选择自己需要的语言,即可生成对应的代码示例。以 Java 语言为例,最终整理成完整的生产消费 Demo 如下:
- 首先参考 Java SDK 添加依赖。
<dependency>
     <groupId>com.tencentcloudapi</groupId>
     <artifactId>tencentcloud-sdk-java-tdmq</artifactId>
     <!-- 请到https://search.maven.org/artifact/com.tencentcloudapi/tencentcloud-sdk-java-tdmq查询所有版本,最新版本如下 -->
     <version>3.1.399</version>
</dependency>- 参考如下 Demo,更换其中的SecretId 和 SecretKey 以及地域参数,以及 topic 和 subscription (均可从控制台复制),运行观察。
import com.tencentcloudapi.common.Credential;
import com.tencentcloudapi.common.profile.ClientProfile;
import com.tencentcloudapi.common.profile.HttpProfile;
import com.tencentcloudapi.common.exception.TencentCloudSDKException;
import com.tencentcloudapi.tdmq.v20200217.TdmqClient;
import com.tencentcloudapi.tdmq.v20200217.models.*;

public class HttpMessageTest
{
    public static void main(String [] args) {
        try{
            // 实例化一个认证对象,入参需要传入腾讯云账户secretId,secretKey,此处还需注意密钥对的保密
            // 密钥可前往https://console.cloud.tencent.com/cam/capi网站进行获取
            Credential cred = new Credential("SecretId", "SecretKey");
            // 实例化一个http选项,可选的,没有特殊需求可以跳过
            HttpProfile httpProfile = new HttpProfile();
            httpProfile.setEndpoint("tdmq.tencentcloudapi.com");
            // 实例化一个client选项,可选的,没有特殊需求可以跳过
            ClientProfile clientProfile = new ClientProfile();
            clientProfile.setHttpProfile(httpProfile);

            //从控制台获取 topic name 和 subscription name,均可从控制台复制
            String topic = "pulsar-***/namespace/topic1";
            String subscription = "subscription1";

            // 实例化要请求产品的client对象,clientProfile是可选的
            TdmqClient client = new TdmqClient(cred, "ap-guangzhou", clientProfile);
            // 实例化一个请求对象,每个接口都会对应一个request对象
            // 向topic1生产1条消息
            SendMessagesRequest req = new SendMessagesRequest();
            req.setTopic(topic);
            req.setPayload("test message");
            SendMessagesResponse resp = client.SendMessages(req);
            System.out.println(AcknowledgeMessageResponse.toJsonString(resp));

            // 向topic1消费1条消息
            ReceiveMessageRequest req = new ReceiveMessageRequest();
            req.setTopic(topic);
            req.setSubscriptionName(subscription);
            ReceiveMessageResponse resp = client.ReceiveMessage(req);
            String messageId = resp.getMessageId();
            System.out.println(ReceiveMessageResponse.toJsonString(resp));

            // 向topic1确认刚刚收到的消息
            AcknowledgeMessageRequest req = new AcknowledgeMessageRequest();
            req.setMessageId(messageId);
            req.setAckTopic(topic);
            req.setSubName(subscription);
            AcknowledgeMessageResponse resp = client.AcknowledgeMessage(req);
            System.out.println(AcknowledgeMessageResponse.toJsonString(resp));
        } catch (TencentCloudSDKException e) {
            System.out.println(e.toString());
        }
    }
}