
环境准备
开发环境准备
准备项 说明 安装JDK JDK8,推荐使用KonaJDK,下载地址 安装和配置IDE 按需选择,比如IntelliJ IDEA或Eclipse 安装Maven 开发环境基础配置,负责构建Java应用程序 Maven配置准备 如果需要本地调试,需要参考 开发环境准备 配置Maven pom.xml,推荐Maven 3.6.3,下载地址 运行环境准备
以下使用Linux环境作为开发机进行应用调试说明。
- 准备开发机(可选):建议使用Linux操作系统,
- 部署客户端:参考在开发机上执行客户端部署,Elasticsearch开发涉及的配置在resources下的application.yml中:
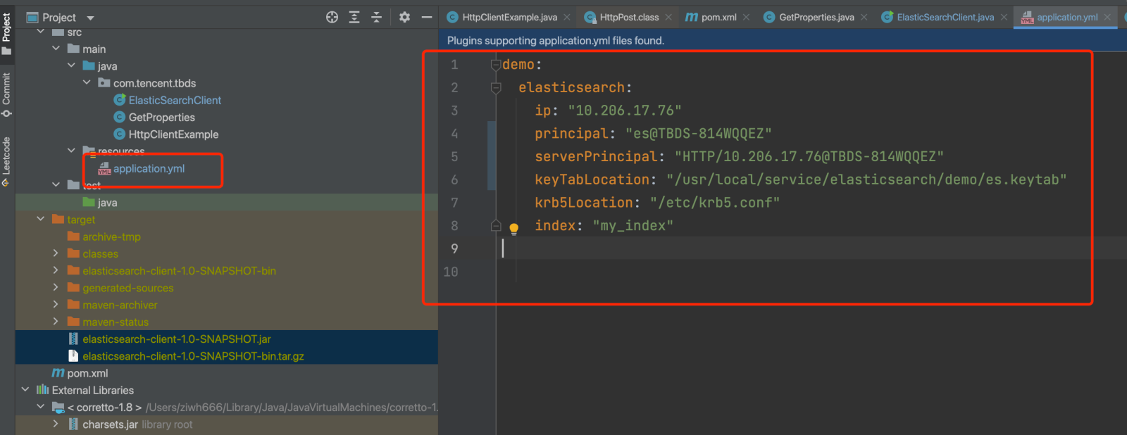

keyTabLocation 需要管理员提供的keytab文件, 需要上传到jar包所在环境, 然后修改配置文件中对应的路径
principal 是指对应keytab文件对应的kerberos用户, 可以通过klist -kt {keytab_file}查看
serverPrincipal 是指ES所在节点与kerberos通信的serverPrincipal 可通过 cat /usr/local/service/elasticsearch/config/elasticsearch.yml | grep principal 查看到
krb5Location 默认是/etc/krb5.conf, 一般不用调整
ip是指ES节点的ip, 一般将jar包上传到哪个节点就配置哪个节点的ip
上传了keytab之后, principal如何查看: klist -kt es.keytab
serverPrincipal如何查看: cat /usr/local/service/elasticsearch/config/elasticsearch.yml | grep principal
3. 导入示例工程代码
以下以IntelliJ IDEA举例,将ElasticSearch示例工程代码导入进行说明。
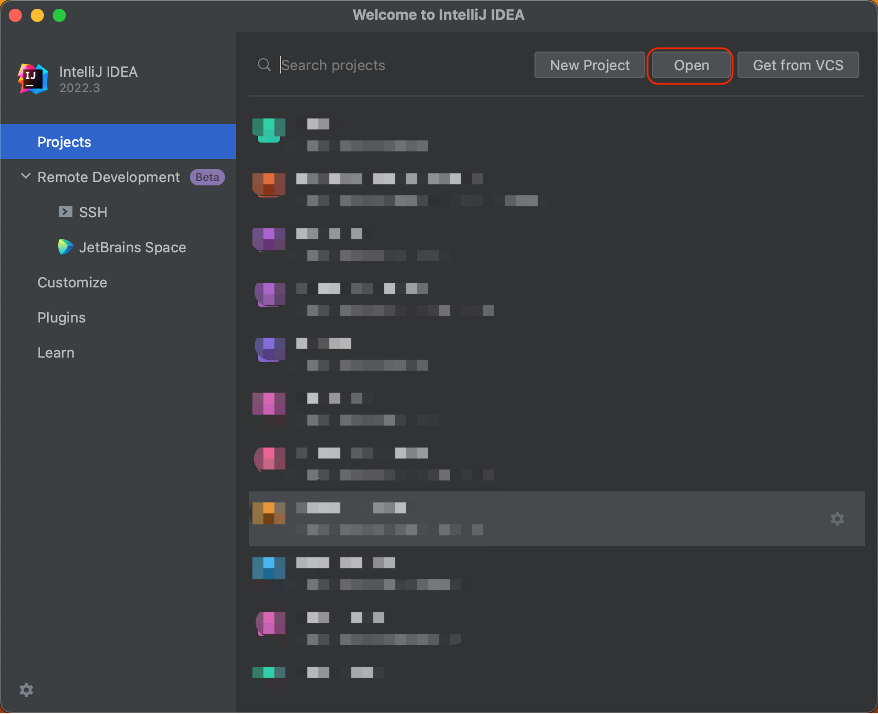
- 在GitHub获取样例代码:仓库地址:https://g-necm8077.coding.net/public/tencentcloud-tbds-examples/tbds-examples/git/files/master
- 导入样例工程到IntelliJ IDEA开发环境
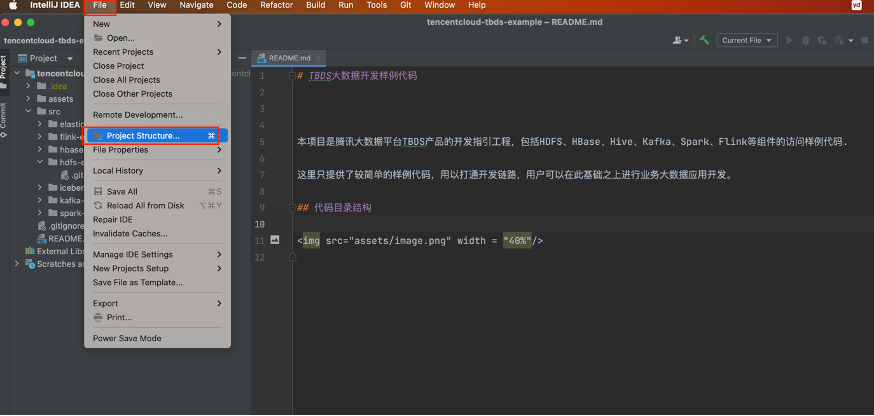
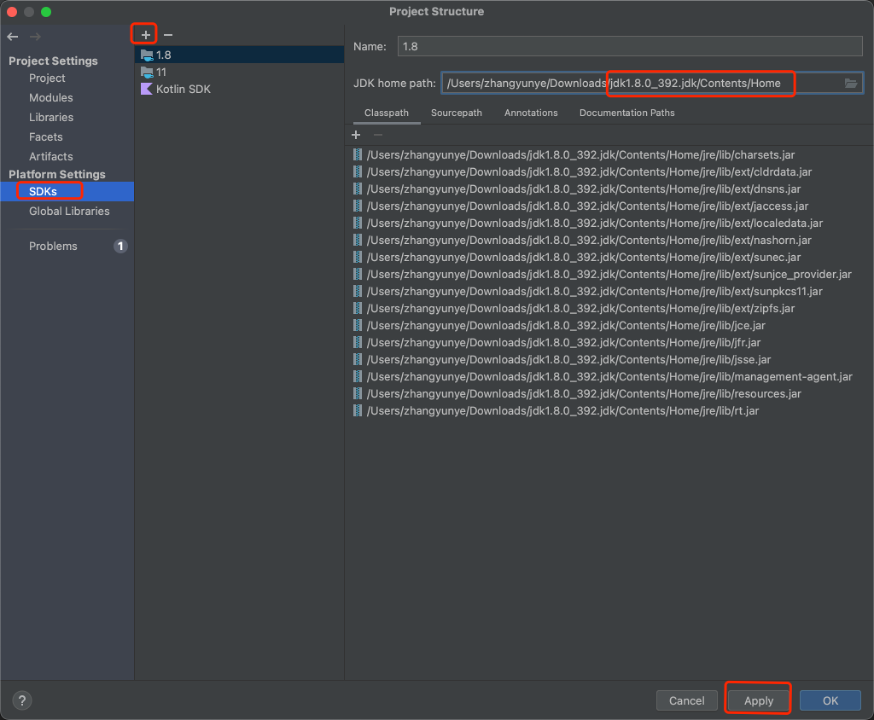
- 安装完IntelliJ IDEA和JDK工具后,需要在IntelliJ IDEA中配置JDK。选择 File 下的 Project Structure,点击 SDKs,选择 JDK 1.8,点击 Apply,再点击 OK。若没有 JDK 1.8,则点击 + 号进行添加,点击 Add JDK 后选择 JDK 1.8 安装目录,然后点击 OK 即可。
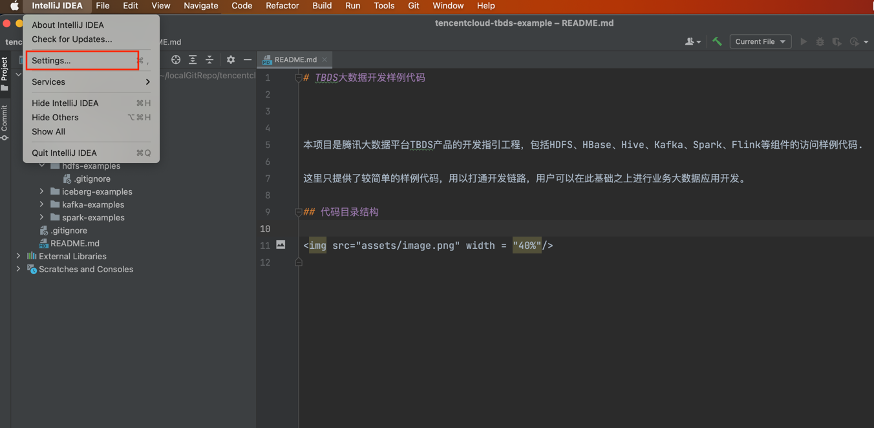
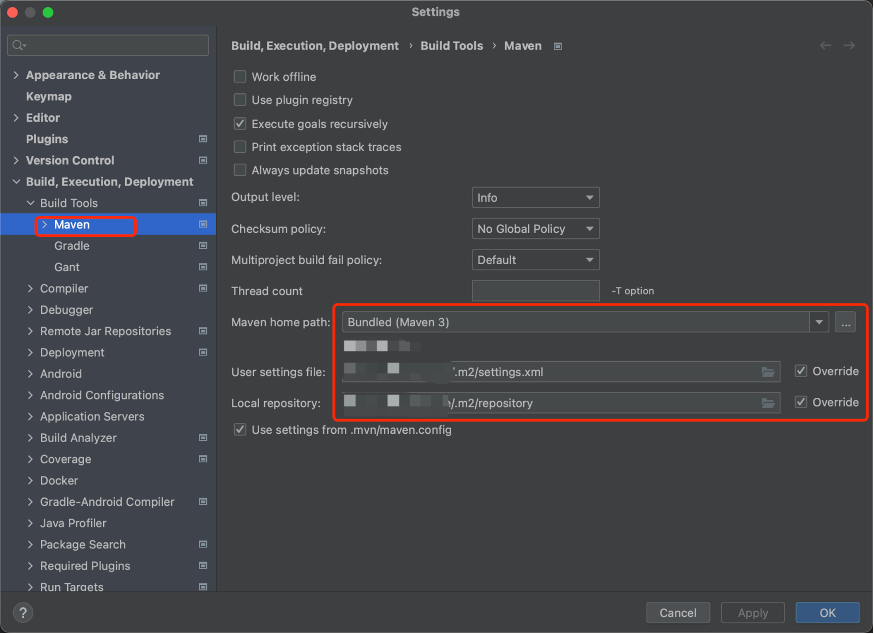
- 将工程依赖的jar包添加到类路径。需确保在本地安装了 Maven,并配置好了环境变量和 settings.xml 文件。IDEA 点击 Settings 进入配置页面,左上角输入 Maven 进行搜索,点击 Build Tools 下的 Maven 配置项,修改 “Maven home path” 为本地 Maven 的安装目录,修改 “User settings file” 为本地 Maven settings.xml 配置文件的文件路径,并勾选 Override,此时 “Local repository” 将自动设置为settings.xml 文件中配置的本地 Maven 仓库的目录。最后点击 Apply,再点击 OK。


用户权限配置
- 到安全集群页面创建用户(管理员需要做的)
这块ES支持LDAP认证和Kerberos认证, ldap认证直接在请求时加上用户和密码, kerberos认证可参考此处的用例.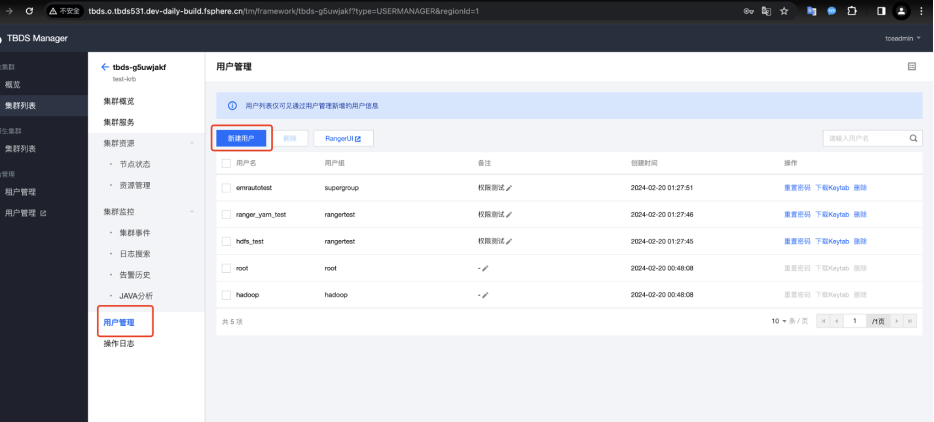
- 参考https://opendistro.github.io/for-elasticsearch-docs/docs/security/access-control/api/#roles文档在Kibana页面或者es节点后台用hadoop用户 为kerberos用户赋予相应的权限 (管理员需要做的). 下面给出了一个用例(注意将${password},${ip:port}替换为实际密码和ip:port):

# 用hadoop用户创建一个es_role角色, 给该角色分配拥有哪些索引的权限
curl -u 'hadoop:${password}' -X PUT "${ip:port}/_opendistro/_security/api/roles/es_role" -H 'Content-Type: application/json' -d'
{
  "cluster_permissions": [
    "cluster_composite_ops",
    "indices_monitor"
  ],
  "index_permissions": [{
    "index_patterns": [
      "*"
    ],
    "dls": "",
    "fls": [],
    "masked_fields": [],
    "allowed_actions": [
      "read"
    ]
  }],
  "tenant_permissions": [{
    "tenant_patterns": [
      "human_resources"
    ],
    "allowed_actions": [
      "kibana_all_read"
    ]
  }]
}'
# 然后将该es_role角色的权限分配给es用户
curl -u 'hadoop:${ip:port}' -X PUT "${ip:port}/_opendistro/_security/api/rolesmapping/es_role" -H 'Content-Type: application/json' -d'
{
  "backend_roles" : [],
  "hosts" : [],
  "users" : ["es"]
}'

#

之后就可以用该用户和密码或
kerberos
认证来进行请求了
代码逻辑说明
功能说明
Elasticsearch demo的主要逻辑如下:
- 加载application.yml配置文件的内容。
- 进行Kerberos认证, 拿到认证的subject。
- 通过subject调用封装好的http请求, 拿到返回的body数据
代码逻辑说明
代码主要包含ElasticsearchClient.java(进行kerberos认证主函数), GetProperties.java(获取配置), HttpClientExample.java(构建http请求), org/apache/http/impl/execchain/MainClientExec.java(为了适配ES的kerberos认证, 重写的HttpClient jar包中的MainClientExec.java方法, 打包时会用该类替换httpclientjar包中的MainClientExec.java类)
 /**
   * 获取初始化配置
   */
   public class GetProperties {
    private Properties properties;
    private Logger LOG = LoggerFactory.getLogger(GetProperties.class);
    public Properties getRequestProperties(String prefix) throws Exception {
        YamlPropertiesFactoryBean yaml = new YamlPropertiesFactoryBean();
        yaml.setResources(new FileSystemResource("application.yml"));
        Properties properties = yaml.getObject();
        Properties requestProperties = new Properties();
        for (Map.Entry<Object, Object> entry : properties.entrySet()) {
            String propKey = entry.getKey().toString();
            if (!propKey.startsWith(prefix)) {
                continue;
            }
            requestProperties.put(StringUtils.substringAfter(propKey, prefix), entry.getValue());
        }
        LOG.info("finish get request info of properties={}", requestProperties);
        return requestProperties;
    }
}
  /**
   *Http请求实现Kerberos安全认证
   */
   public class ElasticSearchClient {


private final String ip;
    private final String principal;
    private final String keyTabLocation;
    private final String serverPrincipal;

    public ElasticSearchClient(String ip, String principal, String keyTabLocation, String serverPrincipal, String krb5Location, boolean isDebug) {
        this.ip = ip;
        this.principal = principal;
        this.keyTabLocation = keyTabLocation;
        this.serverPrincipal = serverPrincipal;
        System.setProperty("java.security.krb5.conf", krb5Location);
        System.setProperty("javax.security.auth.useSubjectCredsOnly", "false");
        if (isDebug) {
            System.setProperty("sun.security.spnego.debug", "true");
            System.setProperty("sun.security.krb5.debug", "true");
        }
    }

    private static HttpClient buildSpengoHttpClient() {
        HttpClientBuilder builder = HttpClientBuilder.create();
        Lookup<AuthSchemeProvider> authSchemeRegistry = RegistryBuilder.<AuthSchemeProvider>create().
                register(AuthSchemes.SPNEGO, new SPNegoSchemeFactory(true)).build();
        builder.setDefaultAuthSchemeRegistry(authSchemeRegistry);
        BasicCredentialsProvider credentialsProvider = new BasicCredentialsProvider();
        credentialsProvider.setCredentials(new AuthScope(null, -1, null), new Credentials() {
            @Override
            public Principal getUserPrincipal() {
                return null;
            }
            @Override
            public String getPassword() {
                return null;
            }
        });
        builder.setDefaultCredentialsProvider(credentialsProvider);
        CloseableHttpClient httpClient = builder.build();
        return httpClient;
    }

    public HttpResponse request(HttpUriRequest request) {
//        System.out.println(String.format("Calling KerberosHttpClient %s %s %s", this.principal, this.keyTabLocation, request.toString()));
        Configuration config = new Configuration() {
            @SuppressWarnings("serial")
            @Override
            public AppConfigurationEntry[] getAppConfigurationEntry(String name) {
                return new AppConfigurationEntry[]{new AppConfigurationEntry("com.sun.security.auth.module.Krb5LoginModule",
                        AppConfigurationEntry.LoginModuleControlFlag.REQUIRED, new HashMap<String, Object>() {
                    {
                        //Krb5 in GSS API needs to be refreshed so it does not throw the error
                        //Specified version of key is not available
                        put("useTicketCache", "false");
                        put("useKeyTab", "true");
                        put("keyTab", keyTabLocation);
                        put("refreshKrb5Config", "true");
                        put("principal", principal);
                        put("storeKey", "true");
                        put("doNotPrompt", "true");
                        put("isInitiator", "true");
                    }
                })};
            }
        };
        Set<Principal> princ = new HashSet<Principal>(1);
        princ.add(new KerberosPrincipal(serverPrincipal));
        Subject sub = new Subject(false, princ, new HashSet<Object>(), new HashSet<Object>());
        try {
            //指定认证模块为Krb5Login
            LoginContext lc = new LoginContext("Krb5Login", sub, null, config);
            //请求kdc进行client身份认证,如果能通过的话,则可以从TGT获取ticket作为后面二次访问时Authorization: Negotiate的基础
            lc.login();
            //无报错则表示client身份认证通过,此时可以在Subject对象中看到已经获取了kerberos的ticket
            Subject serviceSubject = lc.getSubject();
            return Subject.doAs(sub, new PrivilegedAction<HttpResponse>() {
                HttpResponse httpResponse = null;
                @Override
                public HttpResponse run() {
                    try {
//                        HttpUriRequest request = new HttpGet(url);
                        //根据刚刚获取的kerberos的ticket构建Spengo请求,会经历一次401后再带上Negotiate二次请求
                        HttpClient spnegoHttpClient = buildSpengoHttpClient();
                        //返回的为二次响应后的结果
                        httpResponse = spnegoHttpClient.execute(request);
                        return httpResponse;
                    } catch (IOException ioe) {
                        ioe.printStackTrace();
                    }
                    return httpResponse;
                }
            });
        } catch (Exception le) {
            le.printStackTrace();
        }
        return null;
    }

} /**
    *封装请求类
    */
public class HttpClientExample {

    private String url;
    private String json;
    private String method;

    public HttpClientExample(String url, String method, String json) {
        this.url = url;
        this.json = json;
        this.method = method;
    }

    public HttpClientExample(String url, String method) {
        this.url = url;
        this.method = method;
    }


    @Override
    public String toString() {
        return "HttpClientExample{" +
                "url='" + url + '\'' +
                ", json='" + json + '\'' +
                ", method='" + method + '\'' +
                '}';
    }

    public HttpUriRequest execute() throws Exception {
        switch (method.toUpperCase()) {
            case "GET":
                return sendGet();
            case "POST":
                return sendPost();
            case "PUT":
                return sendPut();
            case "DELETE":
                return sendDelete();
        }
        return null;
    }

    public HttpUriRequest sendGet() throws Exception {
        return new HttpGet(url);
    }

    public HttpUriRequest sendPost() throws Exception {
        HttpPost request = new HttpPost(url);
        StringEntity entity = new StringEntity(json);
        request.addHeader("content-type", "application/json");
        request.setEntity(entity);
        return request;
    }

    public HttpUriRequest sendPut() throws Exception {
        HttpPut request = new HttpPut(url);
        StringEntity entity = new StringEntity(json);
        request.addHeader("content-type", "application/json");
        request.setEntity(entity);
        return request;
    }

    public HttpUriRequest sendDelete() throws Exception {
        return new HttpDelete(url);
    }
}

   /**
    *创建用例
    */
   public static void main(String[] args) throws Exception {

        GetProperties getProperties = new GetProperties();
        Properties properties = getProperties.getRequestProperties("demo.elasticsearch.");
        String clientPrincipal =  properties.getProperty("principal");
        String serverPrincipal =  properties.getProperty("serverPrincipal");
        String keyTabLocation = properties.getProperty("keyTabLocation");
        String krb5Location = properties.getProperty("krb5Location");
        String ip = properties.getProperty("ip");
        String index = properties.getProperty("index");
  ElasticSearchClient client = new ElasticSearchClient(ip, clientPrincipal, keyTabLocation, serverPrincipal, krb5Location, false);

        // 新增index
        System.out.println("****************新增index****************");

        String url = "http://" + ip + ":${port}/" + index;
        String body = "{\n" +
                "    \"settings\" : {\n" +
                "        \"number_of_shards\" : 1\n" +
                "    },\n" +
                "    \"mappings\" : {\n" +
                "        \"properties\" : {\n" +
                "            \"field1\" : { \"type\" : \"text\" }\n" +
                "        }\n" +
                "    }\n" +
                "}";
        HttpClientExample httpClient = new HttpClientExample(url, "PUT", body);
        HttpUriRequest request = httpClient.execute();
        HttpResponse response = client.request(request);
        System.out.println(httpResponseToString(response));

        // 查询index
        System.out.println("****************查询index****************");

        url = "http://" + ip + ":${port}/" + index;
        httpClient = new HttpClientExample(url, "GET");
        request = httpClient.execute();
        response = client.request(request);
        System.out.println(httpResponseToString(response));


        // 删除index
        System.out.println("****************删除index****************");
        url = "http://" + ip + ":${port}/" + index;
        httpClient = new HttpClientExample(url, "DELETE");
        request = httpClient.execute();
        response = client.request(request);
        System.out.println(httpResponseToString(response));

    }
代码调试
以下使用IntelliJ IDEA说明示例工程代码调试过程。
- 编译代码
打开IntelliJ IDEA终端,进入elasticsearch-examples目录
cd src/elasticsearch-examples/
使用maven命令打包
mvn install clean package
编译成功界面如下: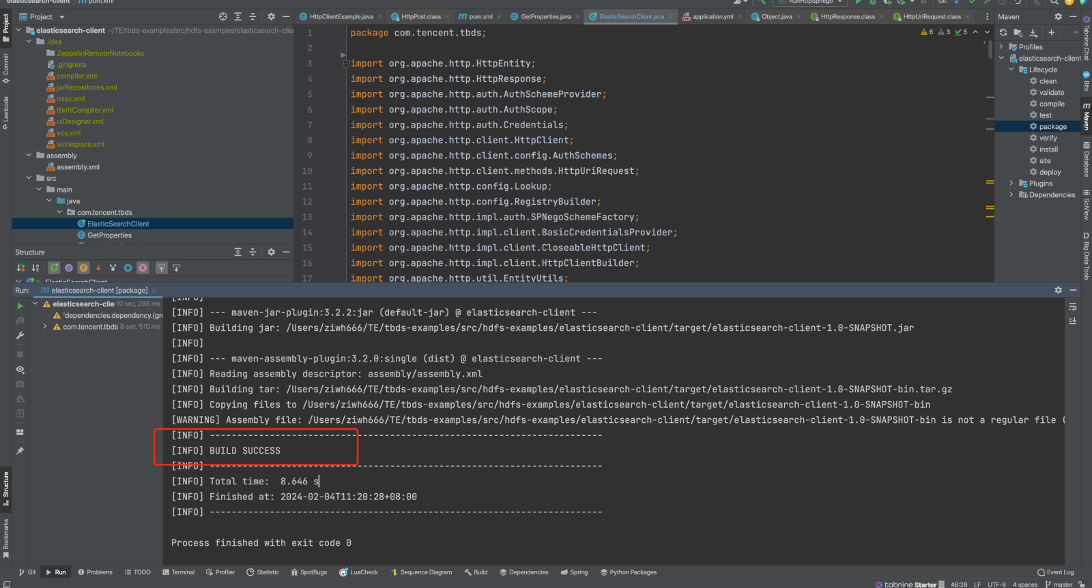
编译过程中遇到报错需要根据错误信息进行排查和修改,打印“BUILD SUCCESS”为编译成功。 - 开发机调试
编译成功后在target目录下得到elasticsearch-client-1.0-SNAPSHOT.jar和elasticsearch-client-1.0-SNAPSHOT-bin.tar.gz文件,上传到开发机新建的/data/demo目录进行调试运行。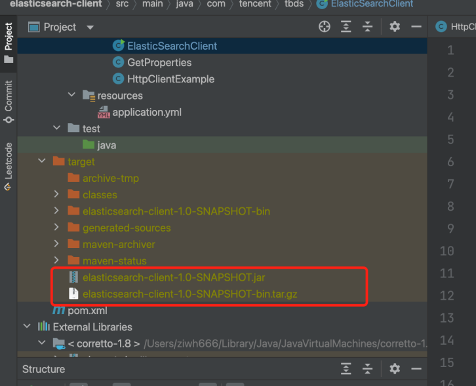


发布
通过上述编译后得到elasticsearch-client-1.0-SNAPSHOT.jar和elasticsearch-client-1.0-SNAPSHOT-bin.tar.gz。其elasticsearch-client-1.0-SNAPSHOT-bin.tar.gz包含运行过程中依赖的目录和文件;elasticsearch-client-1.0-SNAPSHOT.jar为elasticsearch demo的java执行文件。将两个文件上传到开发机,并解压tar包。
将keytab文件也放到对应位置, 修改application.yml的内容。然后运行相应的jar包
命令如下:
#开发机中新建目录
mkdir -p /data/demo
#本地上传压缩文件和jar包
scp elasticsearch-client-1.0-SNAPSHOT.jar elasticsearch-client-1.0-SNAPSHOT-bin.tar.gz root@xx:/data/demo
#开发机上解压压缩文件
cd /data/demo
tar zxf elasticsearch-client-1.0-SNAPSHOT-bin.tar.gz
mv conf/application.yml ./
- 运行样例:在开发机上进入/data/demo目录,执行命令运行jar文件,更多参数说明参考 https://www.elastic.co/guide/en/elasticsearch/reference/7.10/rest-apis.html。该demo演示了对Elasticsearch JAVA API的基本实现,包括:创建索引, 查询索引, 删除索引等功能。后续要调用其他接口, 将对应的URL, method, body参数传入即可。
java -jar elasticsearch-client-1.0-SNAPSHOT.jar